Increasing disk space for a Fresh-Start desktop in your course
If your Fresh Start machine is running low on disk space, you can quickly resize it to gain extra capacity
First, shut down the Fresh-Start machine
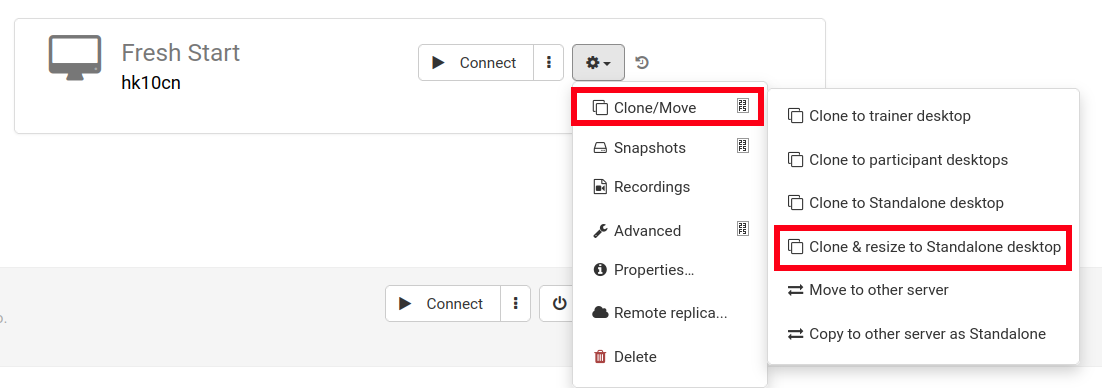
Next, use the Clone & Resize option to convert it to a Standalone as shown below (set up an organization if you don't have one yet)
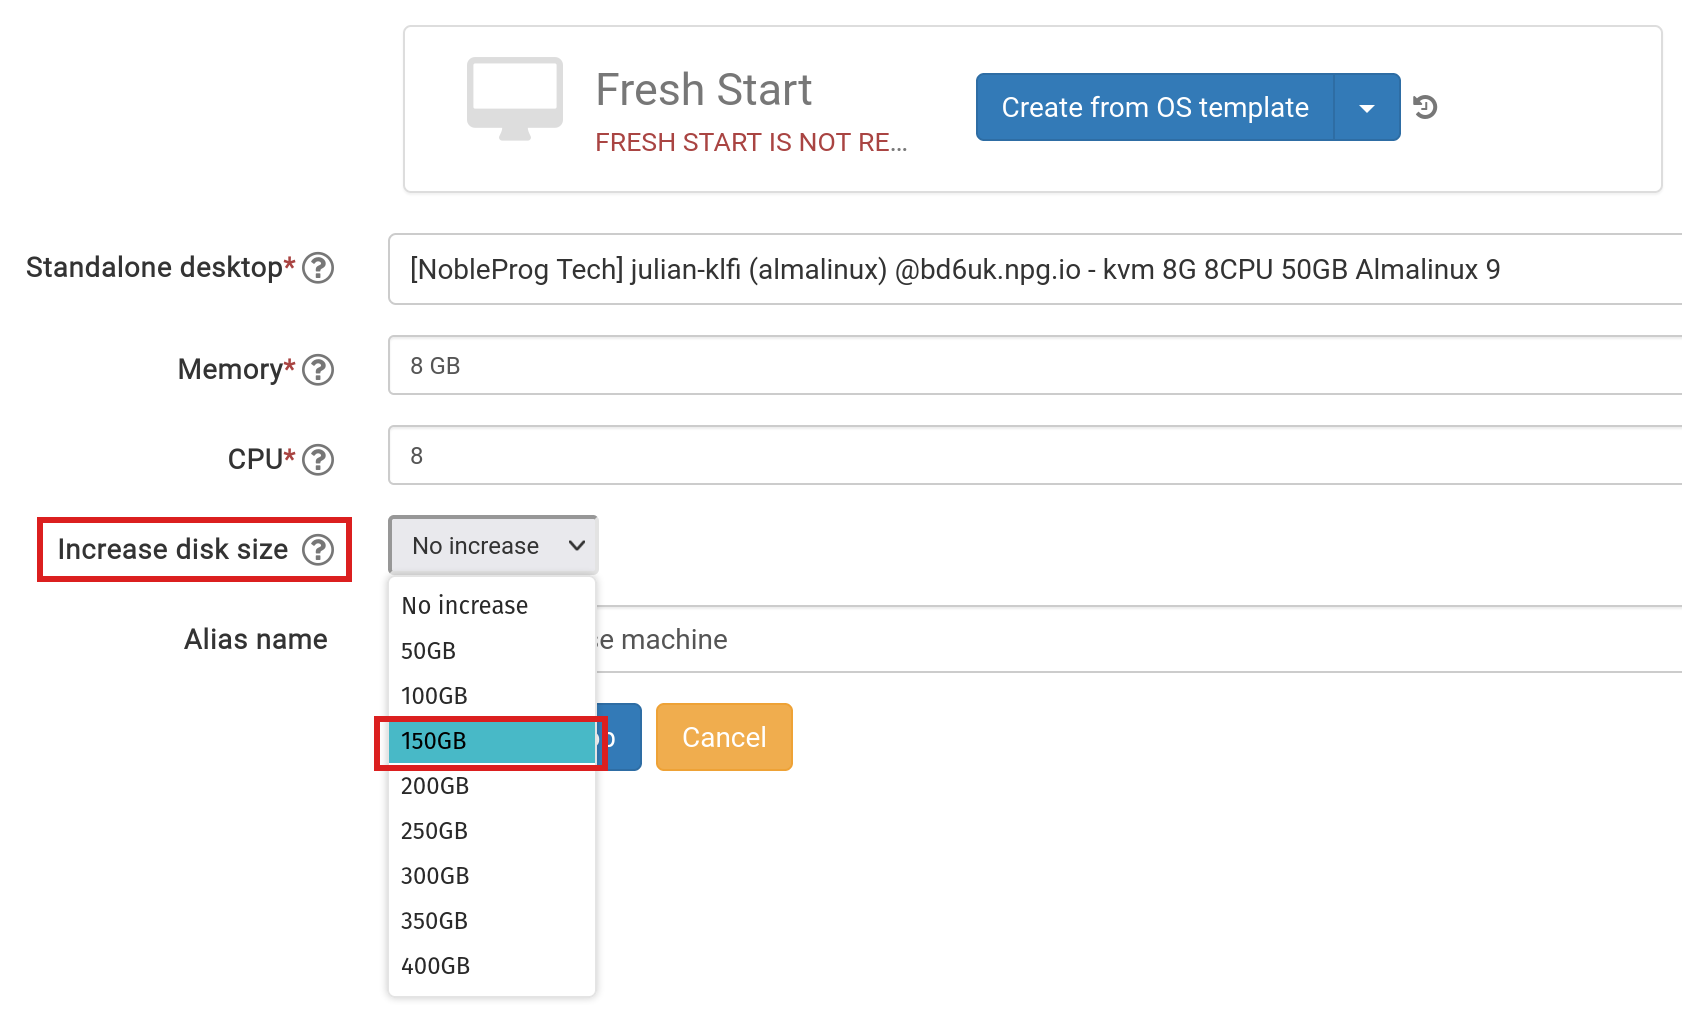
During this step, increase the disk size to the desired amount and submit the change
Head to the 'Standalones' link at the top of the page to locate it and confirm it's present
Back in the course, delete the original Fresh-Start machine using the 'Delete' button
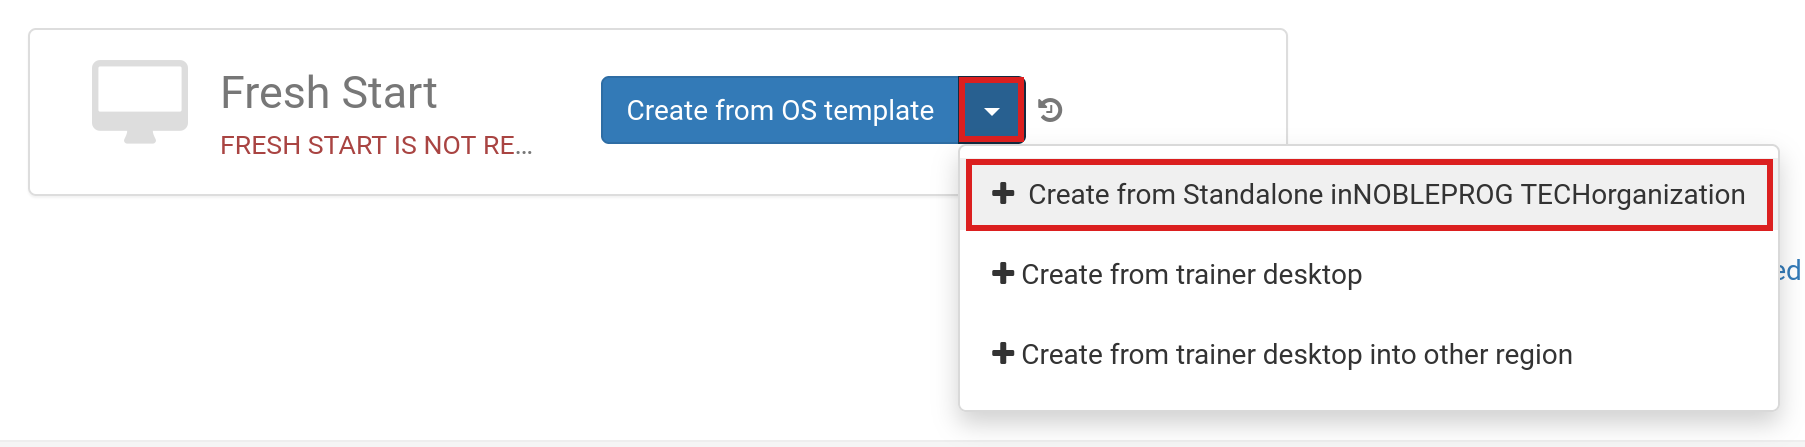
Click the 'Create Fresh-Start from my Standalone' button
Within the 'Create from Standalone' dialog, you have the option to increase the disk size if you didn't do so in the previous step
If needed, add an alias name and then click 'Create Desktop'
With standard DaDesktop Linux and Windows OS templates, the operating system will be expanded automatically. Note: AlmaLinux standard templates set up default partitions differently, so extra manual steps are necessary (see below).
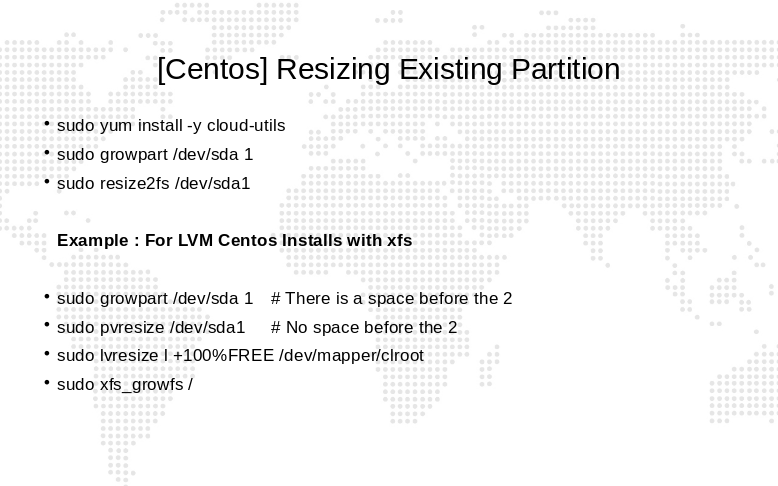
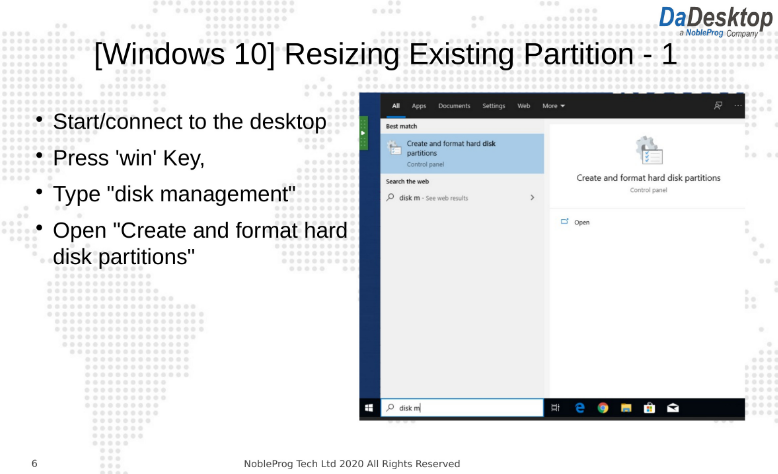
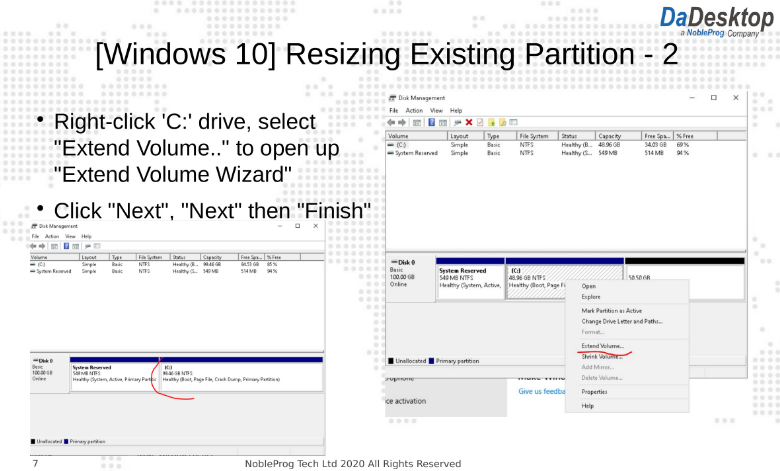
For custom OS templates, you might need to manually extend the partitions; the instructions are provided below.
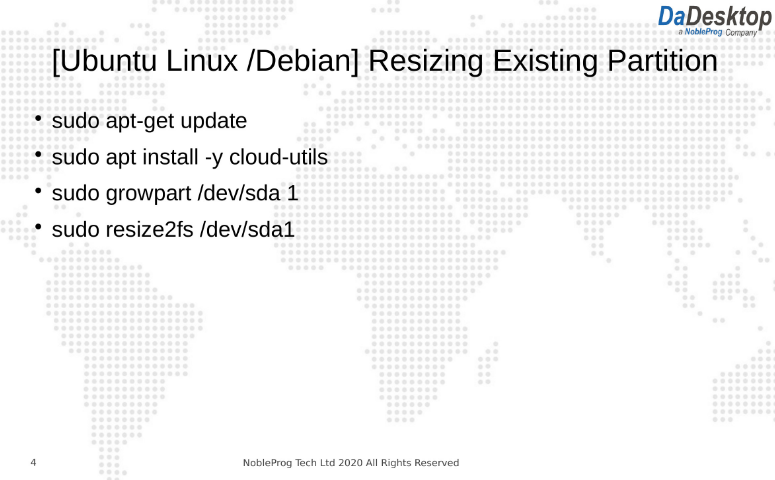
If you're using custom OS templates or AlmaLinux standard templates, follow these steps to expand your partitions
To resize your desktop partitions, open a terminal or command prompt and run the following commands