Recording Management (Beta)
Head over to the Recordings tab inside a course, and you’ll now find options to manage your recordings and videos for that page. Currently in Beta, this feature lets you create Modules, edit and trim videos, and more.
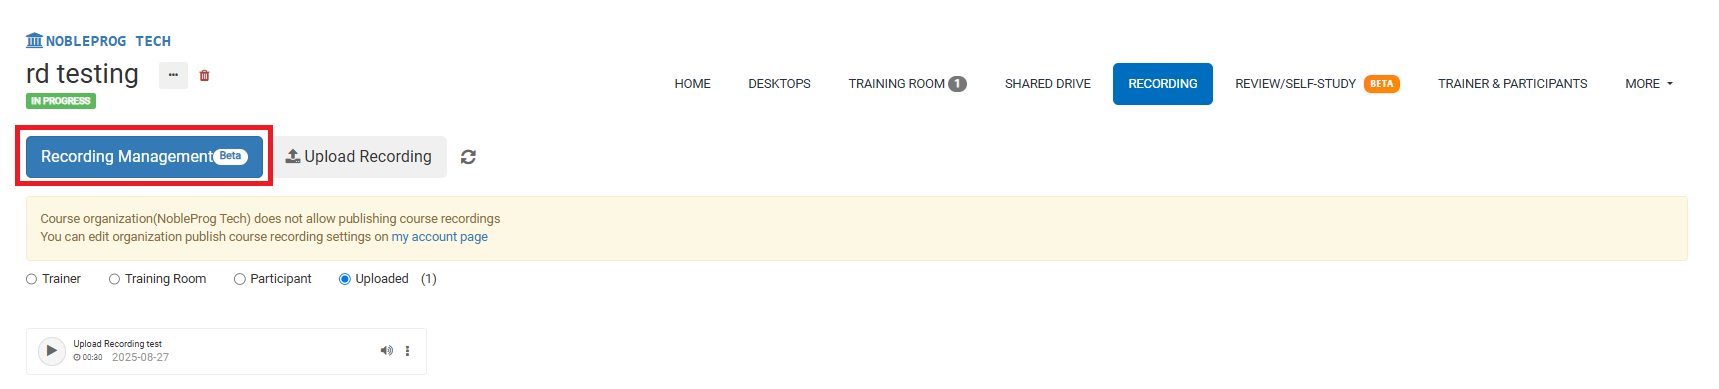
Recording Management Button
Under the recordings tab, you’ll see a large blue button on the left called “Recording Management”. As you record during the course, your clips will collect here and may be tagged as Trainer, Training Room, or Participant.
If you’re positive you’ve made some recordings but they haven’t appeared yet, click the refresh button next to the “Recording Management” button.
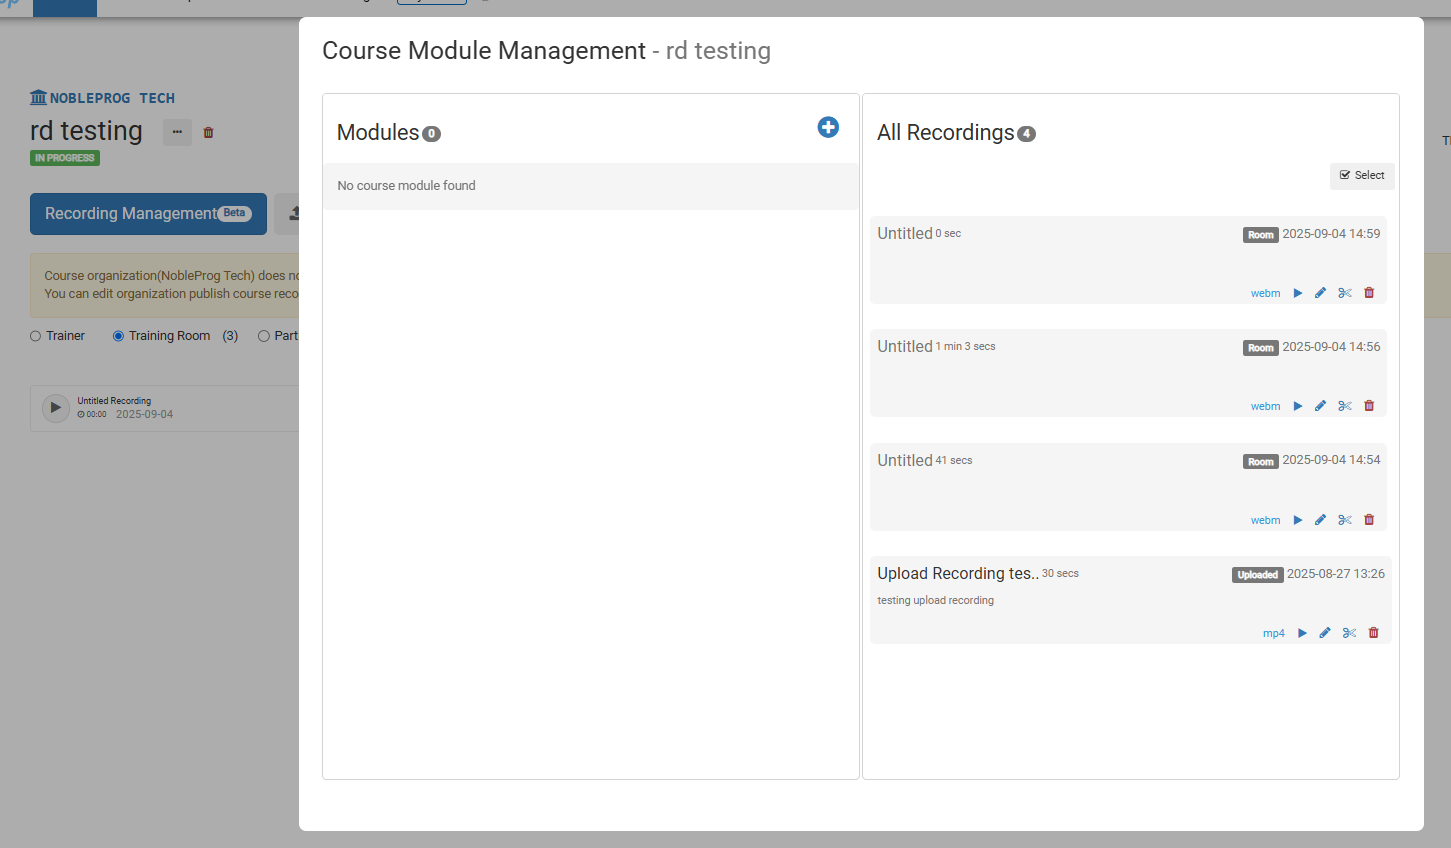
After clicking the button, a new pop-up screen will appear.
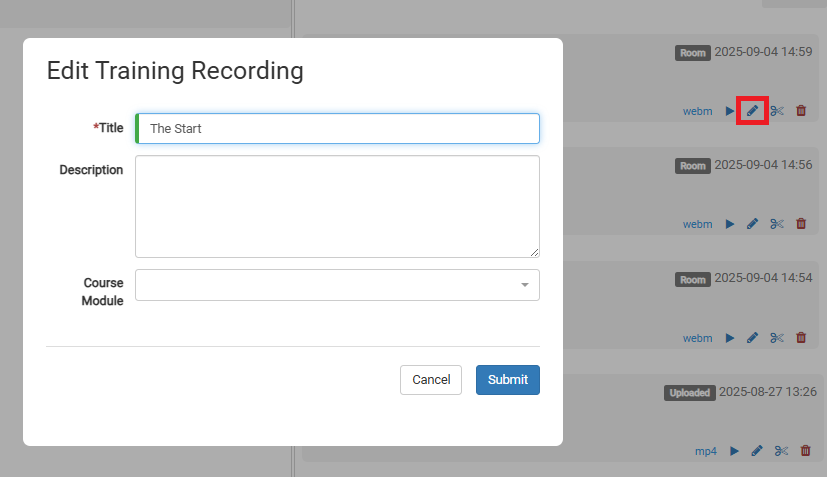
From here, you can edit a video by selecting its pencil icon
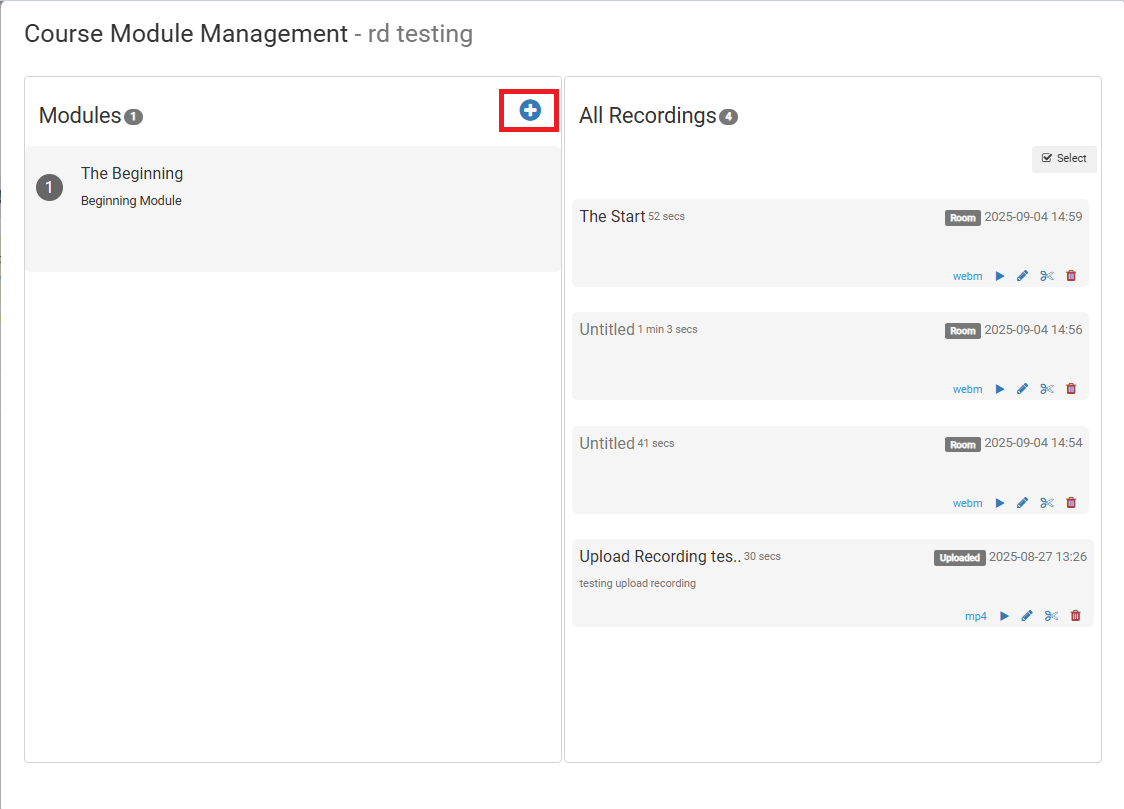
To create Modules, click the (+) icon beneath the Modules box.
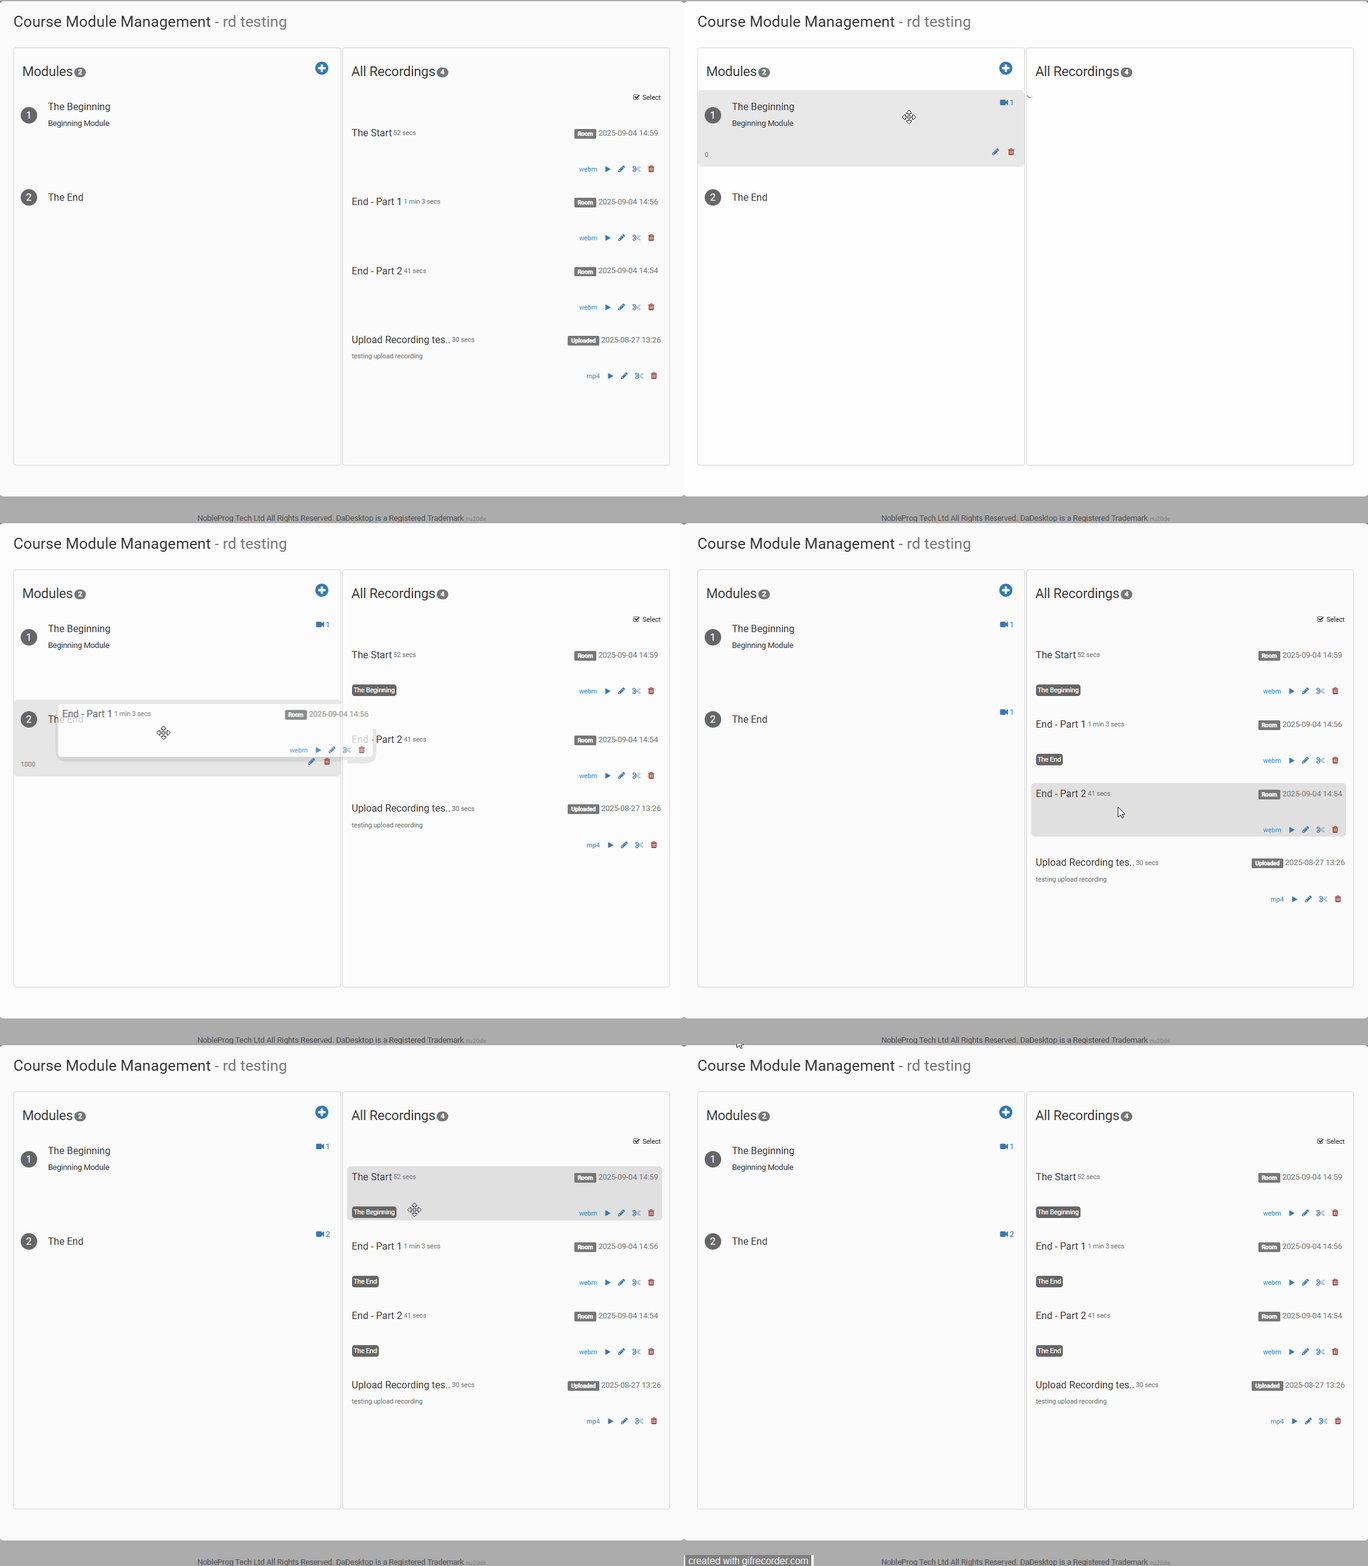
Once your modules exist, you can start moving videos into them. You can either drag and drop
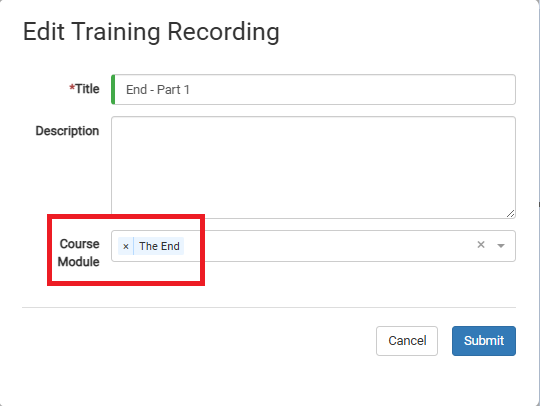
Or you can assign them manually when editing the video
Video Editing
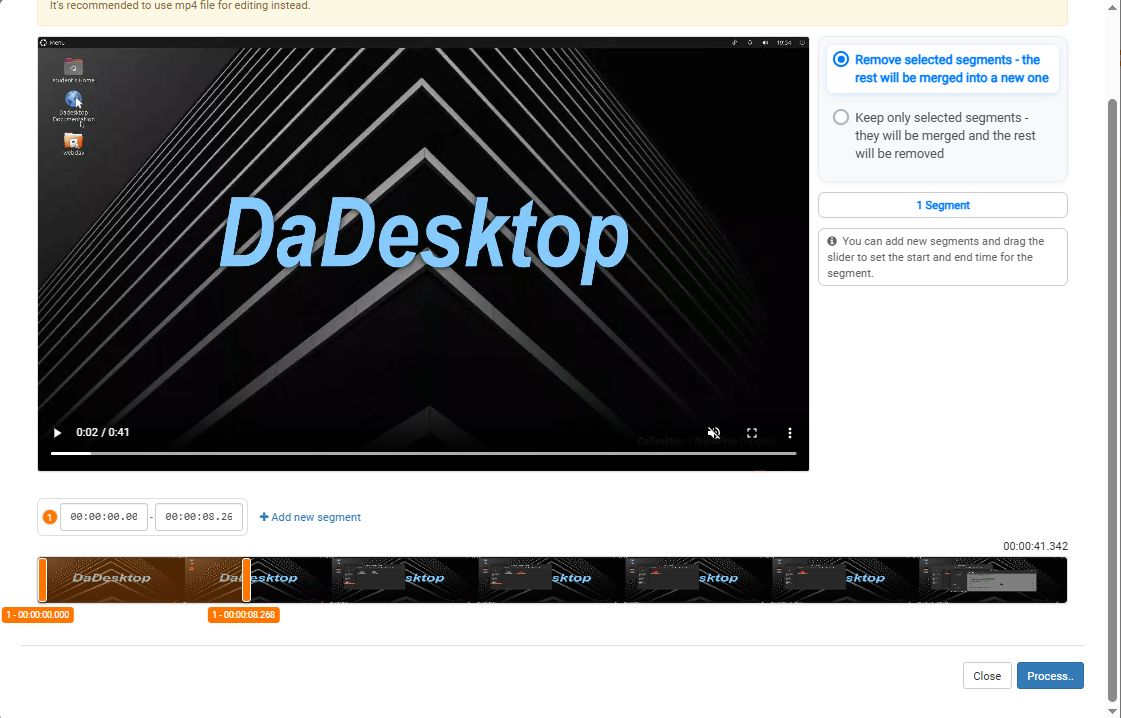
You can perform some simple video editing here. If your recording includes idle stretches or moments fumbling for a file that you’d rather not display in your demo, use the “scissor” icon on the video to trim and adjust it.

This launches an Edit/Cut Recording window where you can scrub through and cut your video. After you’re happy with the edits, you can process the video to render your changes.